This resource was used: http://community.pachube.com/arduino/usb/processing
A developer account has been set up titled ‘siobhan2010’ which was used, and the tutorial was followed to connect a simple LDR (light sensor) to the Pachube network).
The Arduino board was wired up with a LDR on sensor AO and a 10k ohm resistor.
.JPG)
The ‘StandardFirmata’ code was uploaded to the board. NOTE: The arduino code window HAS to be closed otherwise processing won’t run the code at all.
.JPG)
The ‘StandardFirmata’ code was uploaded to the board. NOTE: The arduino code window HAS to be closed otherwise processing won’t run the code at all.
Processing was then opened and the arduinoInput_Firmata sample code was run on it. Below is a screenshot of it working.

The readings at the bottom of the window are from the LDR.
Then the sensors readings needed to be uploaded to Pachube, The EEML library for processing was downloaded and added to the processing library via this link http://www.eeml.org/library/. The code was edited slightly at this stage according to the tutorial instructions. Comments were appended to the provided source code as a reminder of exactly what they do.
This was tested locally first by visiting http://localhost:5210/
Below is a screenshot of the resulting XML file. The sensor value changes, so it was working correctly.

The next step was to determine the operating computers IP address, which was done by running cmd.exe then entering the command ‘ipcongif/all’. It was double checked by visiting http://www.whatismyip.com/. Unfortunately the computer was behind a firewall and had to be plugged directly into the internet rather than WIFI.
The Firmata Test program from the websites wiki was used to test that the sensor was running.
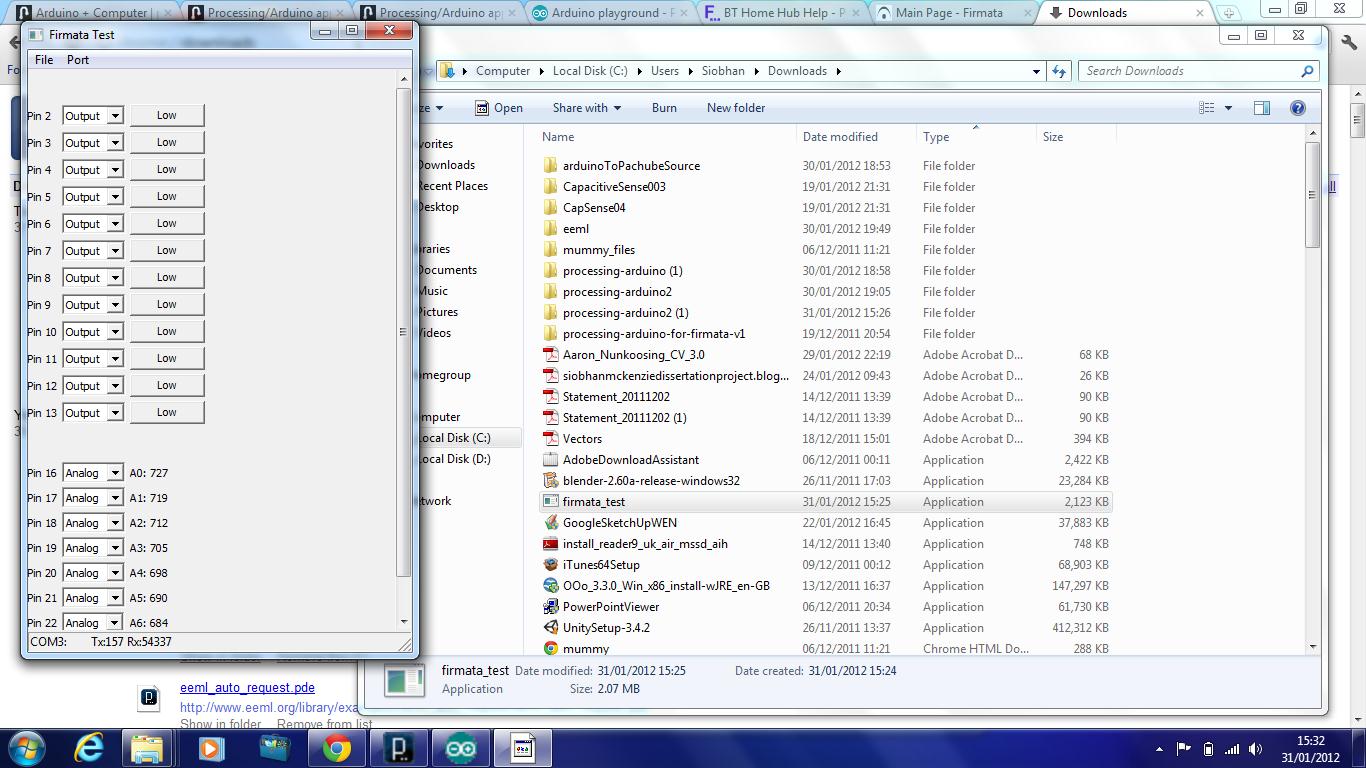
Arduino_input sketch from the firmata library within processing was used to further test the sensor. The circles get larger and the corresponding square fills in when the sensor is hovered over. This is visual output, and there is potential for screen parts of outcomes could be created using this.

Some coding experimentation occurred here; the update has been commented in. The brighter the light, the smaller the circles.
import processing.serial.*;
import cc.arduino.*;
Arduino arduino;
color off = color(4, 79, 111);
color on = color(84, 0, 158); //outline colour changed to purple
void setup() {
size(470, 280);
arduino = new Arduino(this, Arduino.list()[0], 57600);
for (int i = 0; i <= 13; i++)
arduino.pinMode(i, Arduino.INPUT);
}
void draw() {
background(off);
stroke(on);
for (int i = 0; i <= 13; i++) {
if (arduino.digitalRead(i) == Arduino.HIGH)
fill(on);
else
fill(off);
rect(420 - i * 30, 30, 20, 20);
}
for (int i = 0; i <= 5; i++) {
ellipse(280 + i * 30, 240, arduino.analogRead(i) / 16, arduino.analogRead(i) / 16);
}
}
PROBLEM: Required to edit firewall settings
Changing the pachube connection technique had to happen here as it was safer than interfering with home firewall settings. To get around not having automatic updates, the code can just be set to update more regularly (say once or twice a second) to give the appearance of immediate effect.
After this, the rest of the Pachube tutorial was followed. Because the network being used was a local one, the firewall settings had to changed.
Instead of doing it this way and having automatic updates, which would mean having to change home firewall settings (http://www.filesaveas.com/bthomehub_portforwarding.html), manual updates are going to be used which is much easier to do on a shared connection. The code had to be edited and I had to find my API key and create a feed address to use.
The tutorial for this is available here: http://community.pachube.com/?q=node/97
I had to update the code with my EEML address which is http://www.pachube.com/api/46509.xml
The feed works and is live at: https://pachube.com/feeds/46509
The working code is below:
NOte: The API KEY has been commented out for security reasons.
import processing.serial.*;
import cc.arduino.*;
import eeml.*;
Arduino arduino;
float myValue;
float lastUpdate;
DataOut dOut;
void setup()
{ println(Arduino.list());
arduino = new Arduino(this, Arduino.list()[0], 115200);
//dOut = new DataOut(this, 5210);
dOut = new DataOut(this, "http://www.pachube.com/api/46509.xml", "—MyAPI-KEYWasHere");
dOut.addData(0,"light sensor, LDR, light level, light dependent resistor");
}
void draw()
{ myValue = arduino.analogRead(0);
println(myValue);
if ((millis() - lastUpdate) > 5000){
println("ready to PUT: ");
dOut.update(0, myValue);
int response = dOut.updatePachube();
println(response);
lastUpdate = millis();
}
}
void onReceiveRequest(DataOut d){
d.update(0, myValue);
}
The next step will be to look into the new pachube ‘trigger’ feature http://community.pachube.com/triggers and also deal with data from remote feeds.
Below is a screenshot of the 1hr data feed.

No comments:
Post a Comment